What is in this guide
Start a kid friendly kitchen setup with one reachable place for everyday items, a clear agreement about what children may take, and somewhere to return them. Choose one task your child already does with your agreement, such as getting a bowl, before rearranging the rest of the kitchen.
1. Choose the task before choosing the storage
Write down the small job you want the layout to support: collecting a bowl and spoon, finding a lunchbox, or putting clean cups away. Start with one of these rather than handing over a whole cupboard.
For this guide, helping themselves means doing an agreed household task. It does not establish when a child is ready to prepare food or use kitchen equipment.
Walk through the job together. Ask your child to show you where each item lives and where it goes afterwards. Notice the point where they need you: finding the lid, reaching the bowl or knowing whether something is available.
Make that point the first change. If the bowl is easy to get but its lid is in another cupboard, moving more bowls down will not address the missing lid.
2. Pick one space you can spare
Use existing storage for the first version. Compare the options against the task and the space you have.
| Option | Choose it when | Trade-off to consider |
|---|---|---|
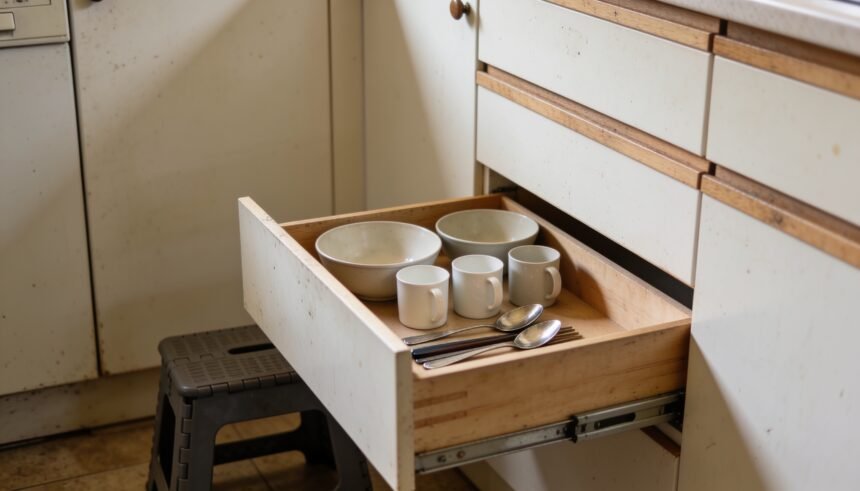
| A section of a drawer | The child can already open it and retrieve the agreed items | It takes space from other everyday utensils |
| The front of a reachable cupboard shelf | You can give bowls and cups a clear place near the front | Items stored behind them still need a home |
| A basket brought out by an adult | There is no suitable permanent space, or several people share the kitchen | An adult still has a setup job each time |
Use a space the child can reach while standing on the floor. If none suits, choose the adult-set-out basket for now rather than making climbing part of the routine.
In a rental, begin by moving loose items within existing storage. There is no need to plan new cabinetry to try a bowl-and-spoon drawer.
For a broader cupboard reset, use the separate guide to organising a family pantry. Keep this small space focused on the task you chose.
3. Put the whole set together
For collecting a bowl, place the everyday bowls beside the spoons you have agreed the child may use. For finding a lunchbox, keep its matching parts together. Start with a small selection rather than the household’s full collection.
Try arranging bowls beside cups instead of underneath them. Choose a layout where getting one item does not require unpacking everything else first.
Leave room for the return. An arrangement that only fits when an adult stacks it precisely is worth simplifying. Remove spare pieces before buying a divider.
If a picture would help identify the spot, use a simple drawing of the item. Words are optional; matching labels are optional too. Ask the child to put the clean items away once, then adjust whatever remains unclear.
4. Agree what the space means
Being able to reach something and having permission to take it are separate decisions. Explain the rule in words your household already uses.
For example: “These are the bowls you can get when we are setting the table.” That is more specific than calling an entire cupboard the kids’ cupboard.
If your task includes collecting food, decide which items are available and when before changing their location. For ideas about what to offer, see after-school snacks. The storage arrangement here does not decide the menu or portions.
Keep chilled-food organisation as a separate job. Use the family fridge organisation guide when reviewing that space, rather than moving food into a cupboard simply to group everything together.
5. Give used items a destination
Choose a clear place where your household already collects used dishes. Show the child what happens after the bowl or cup has been used. Keep returning clean items and leaving used ones as two distinct jobs.
For lunchboxes, decide where the empty box goes after school and where the clean box belongs later. Avoid requiring the child to guess which stage it is at.
Include the return in your walkthrough. Try the whole sequence: get the item, use it for the agreed task, then leave it in its designated place. Change the layout if the last step is awkward.
6. Fit the routine around the household
In a narrow kitchen, choose a task that can happen before the main meal preparation begins, such as collecting bowls for the table. Avoid turning the same patch of floor into everyone’s workstation.
Where siblings share storage, give each child’s everyday items a place if that makes ownership clearer. They can share the cupboard without sharing identical permissions or tasks.
For a shared kitchen, a portable basket may be the more workable compromise. It gives the items a home while letting the space serve another purpose afterwards.
Choose an existing household checkpoint for an adult reset, such as putting clean dishes away. If you already use a weekly meal planning routine, include a quick look at whether the agreed items are still in their places.
Change the part that still needs your help
If the child keeps asking where something is, check whether its location changes. If they leave clean items out, check whether the return space is full. If the arrangement is ignored, ask them to show you the difficult step before adding more labels.
Your next step is small: choose one everyday task, clear one reachable space and walk through the get-use-return sequence together.
The one-page family week
One printable page that holds the whole week: meals, school, activities and who is doing the pickup. Free, and we send one useful email a week.
One email a week. No spam, unsubscribe in a click.