What is in this guide
Start by taking damp towels, blankets and the dog’s removable cover out of the car, then check and clean the surface underneath according to its care instructions. Dry everything fully before judging the result. You may only need to wash the travel gear and attend to one seat or boot area.
Step 1: Take the portable smell sources outside
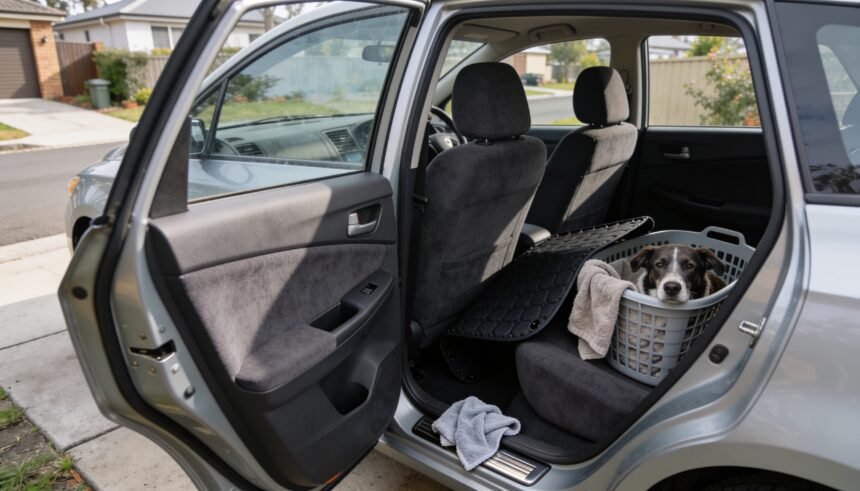
Empty the area where the dog travelled. Lift out the towel, blanket, removable bed, seat cover and any loose mat, keeping damp items separate from clean gear. Check the bag you used for the trip too: a forgotten wet towel can stay in the boot even after the visible mess is gone.
Keep those items out while you work on the car. This gives you a useful comparison between the empty travel area and the things normally sitting in it. If the car smells noticeably better once the gear is removed, start with that gear rather than washing unrelated seats.
Read each item’s care label before washing. A removable cover and its padded backing may have different instructions, and a rubber-backed liner should not inherit the washing settings of a cotton towel. The guide to washing pet bedding properly covers separating those layers and returning them only when dry.
You do not have to wash all the gear together. Set aside clean, dry items and deal with the damp or visibly dirty pieces first. That keeps this job manageable when the laundry is already full.
Step 2: Find the patch that needs attention
With the cover off, inspect the seat cushion or boot floor directly underneath. Look along seams, beneath the edge of a loose mat and around the spot where the towel ended. Use a clean, dry cloth to check for surface dampness without adding water.
Work through a short list:
- The removable cover or blanket itself.
- The seat or liner below it.
- The nearby floor mat and accessible carpet.
- Loose gear tucked beside the dog’s usual travel spot.
Treat this as a location check, not proof that a particular material caused the smell. If the cover is damp but the seat underneath is dry and clean, wash the cover and reassess before wet-cleaning the seat. If both need attention, keep them apart throughout cleaning and drying.
Leave fixed trim and seat components in place. Pulling a seat apart to chase a smell moves beyond this routine-care job. Make a note of any area you cannot reach so you can explain it to a detailer later if needed.
Step 3: Remove loose hair and dirt first
Vacuum the affected travel area with an upholstery attachment, paying attention to accessible seams and edges. RACV’s seat-cleaning guidance starts with vacuuming to remove dirt and pet hair. [S2] You can follow that order without committing to a full car detail.
Pick off visible clumps from the removable cover before washing it. For fur elsewhere in the household, removing dog hair from floors and surfaces covers the wider cleaning routine.
Keep the scope tied to what you found. A dirty boot liner does not automatically mean the front seats need shampooing. Once the loose material is removed, check the exposed area again before deciding whether it needs damp cleaning at all.
Step 4: Clean the affected surface by its own instructions
Check the vehicle’s owner manual for the material you are dealing with. Cloth, leather and suede-like upholstery can have different restrictions. A cleaner suitable for one should not be assumed suitable for another, and a household carpet method is not permission to use it inside a car.
Ford’s interior-care guidance, for example, directs vacuuming or brushing away loose dirt, then wiping listed surfaces with a soft damp cloth and mild soap solution, followed by a clean dry cloth. It also says to avoid soaking. [S1] Use your own vehicle’s instructions to choose the method rather than treating this example as a recipe for every car.
If those instructions call for an upholstery cleaner, follow its suitability and application directions as well. RACV likewise directs readers using fabric-seat cleaner to follow the product instructions. [S2] Do not invent a stronger dose because the smell is noticeable.
Targeted cleaning may mean the whole affected seat panel rather than a tiny scrubbed circle. Ford notes that spot cleaning can leave a ring and may require cleaning across the surface. [S1] Follow the applicable instructions if that happens. Washing one affected panel is still a much smaller task than wet-cleaning the whole cabin.
Skip improvised vinegar, powder or fragrance treatments for unknown upholstery. They add another variable when the useful question is whether removing the dirty gear and cleaning the affected surface has helped.
Step 5: Dry the layers separately, then reassess
Leave the removable gear out while the car surface dries. Follow the drying directions for each item, and arrange ventilation when the car is parked securely and the weather allows. Choose a time when you can keep an eye on open doors or windows; rain blowing into the cabin would undo the work.
There is no reliable universal drying time for this job. A thin towel, a backed liner and a padded seat are different things. Check both sides of removable items and any folds before putting them back. A dry-looking top is not enough to judge the underside.
If you need the car before the washed cover is ready, leave that cover out. For a later dog trip, use suitable clean, dry travel gear and follow the usual restraint setup. The guide to planning a road trip with a dog covers the broader travel arrangements.
Once the area and gear are dry, reassess without adding perfume. Check the empty car first, then return the clean gear. This sequence helps you notice whether the remaining problem is in the cabin or one portable item. It does not guarantee that a surface wipe will resolve odour in deeper padding.
What if the smell remains?
Return to the location you identified rather than immediately spraying every surface. Check whether a second damp item was missed, whether the underside of a liner is still wet, or whether your vehicle’s care instructions limited what you could clean.
If the smell persists in a dry, empty car, ask a professional detailer to assess the affected area. Explain where the dog travelled, whether the seat got wet and what cleaning you have already done. Unexplained recurring damp, odour that seems to come from the vents, or visible mould needs assessment beyond this routine. Avoid dismantling trim or repeatedly soaking the seat to reach a hidden problem.
For the next wet trip, keep a clean travel towel ready and take the used one inside when you arrive. RACV lists covers, mats and boot liners among its ways to keep an interior cleaner. [S2] Pick removable gear with care instructions you can follow in your household, then make taking it out part of unpacking the car.
How we checked this: Checked on 10 October 2026 against Ford interior-care instructions and RACV car-cleaning guidance. The location checks and reassessment sequence are editorial suggestions. No car, cleaner or odour-removal method was tested, and no drying time or removal rate is claimed.
The one-page family week
One printable page that holds the whole week: meals, school, activities and who is doing the pickup. Free, and we send one useful email a week.
One email a week. No spam, unsubscribe in a click.