What is in this guide
- 1. Put the model details beside the checklist
- 2. Look around the blender cup or jug
- 3. Check the lid and visible seal without prising anything out
- 4. Inspect blades and mixer tools visually
- 5. Check where the bowl and accessories attach
- 6. Decide what happens to each part
- 7. Keep the record with the appliance
Check clean blender cups, lids, seals and mixer attachments for cracks, missing pieces and changes in fit, with the appliance switched off and unplugged. Set damaged or questionable parts aside and use the exact model’s manual or manufacturer support to decide what needs replacing before the next use.
1. Put the model details beside the checklist
Find the model number on the appliance label or purchase record. Photograph it, then locate the matching user guide. A family name printed on the front is not enough to confirm that a replacement cup, beater or bowl fits.
Clear a section of bench and inspect one appliance at a time. Keep the motor housing closed and remove only accessories that the manual says are user-removable. This is a check of accessible parts, not a reason to dismantle the machine.
Use a short note with four headings: part, visible condition, change noticed and next action. For example, write “lid tab missing at rear” instead of “blender broken”. The specific description gives the supplier something useful to assess.
2. Look around the blender cup or jug
After cleaning as directed, look at the walls, base, rim and attachment points in good light. Turn the empty container to view each side without reaching towards a blade. Note any crack, chipped edge, missing tab or line you cannot identify.
NutriBullet’s safeguards say to discontinue use and replace blending containers showing cracking, crazing, cloudiness or plastic damage. That is manufacturer guidance for its containers, not permission to judge another brand by appearance alone. Check your own manual if the surface has changed.
Do not fill a questionable container and run the blender to see whether it holds. Photograph the area instead. If a mark remains unclear after the approved cleaning method, put that uncertainty in the support request rather than labelling it harmless wear.
3. Check the lid and visible seal without prising anything out
Look around the lid edge, closure and any visible gasket. Record a split, a missing section or a seal that is visibly out of position. Check the manual before attempting removal: a rubber ring is not necessarily a separate serviceable part.
The nutribullet FAQ says its blade gaskets are factory-sealed and are not designed for removal or separate replacement. A worn, torn or loose gasket can call for a replacement blade assembly. Do not apply the removal method from a lunchbox lid to a blender blade housing.
If a leak prompted the inspection, note where it appeared and which components were fitted. A useful message is “liquid appeared around the cup-to-blade joint with this cup and assembly”. That records an observation without guessing which component failed.
4. Inspect blades and mixer tools visually
For the blender, keep fingers away from blade edges. NutriBullet explicitly warns against touching them. Leave sharpening, straightening and dismantling out of this check; ask the maker about a visibly damaged blade or an assembly that no longer fits normally.
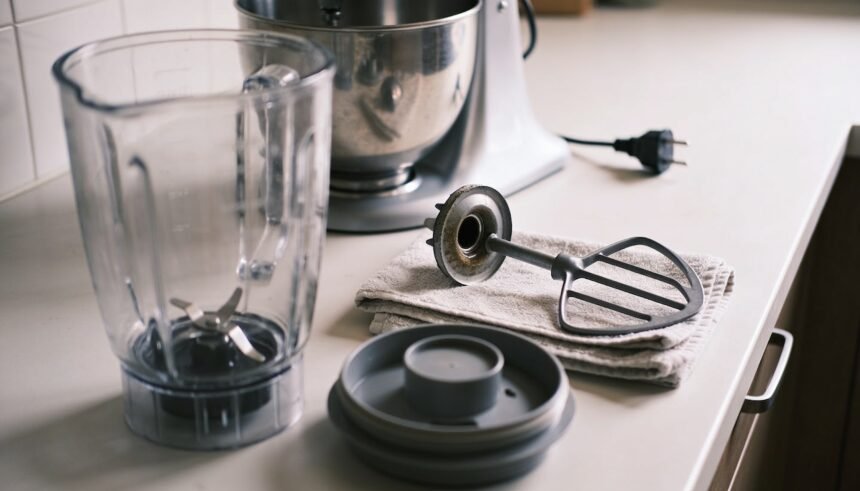
For a mixer, lay out its removable beaters, whisk and dough hook. Look for chipped coating, a bent-looking section, loose-looking wires or damage around the attachment opening. Photograph the whole tool and then the suspect area so support can see both its identity and condition.
KitchenAid Australia explains that coating worn from the bottom of a white beater can result from contact with the bowl and says the affected beater should be replaced. It also identifies clearance as something that may need correction. Follow the instructions for the exact mixer or request service; this checklist does not prescribe an adjustment.
Treat cookware as a separate care job. Our guide to looking after non-stick pans covers their surfaces and storage without assuming they follow mixer-accessory instructions.
5. Check where the bowl and accessories attach
With the mixer still unplugged, compare the bowl seating and attachment arrangement with the manual’s illustrations. Look for a missing piece or visible damage before attempting normal assembly. Do not force a bowl or accessory into place to overcome a change in fit.
KitchenAid Australia’s guidance for a bowl that will not stay secure includes checking the locking features on the bowl base and base plate for wear. Ask support which component needs attention rather than ordering a bowl because it is the easiest part to remove.
For a hand mixer, record the condition of each removable beater and its insertion end. If a beater will not retain as the manual describes, stop there and seek model-specific advice. Do not open the housing to investigate the release mechanism.
6. Decide what happens to each part
Use the notes to assign a practical next action:
- Clean and recheck: Residue is hiding the surface. Use only the approved cleaning method, then look again.
- Ask the manufacturer: A mark, changed fit or missing-looking feature needs identification. Keep the part out of use while the question is unresolved.
- Confirm a replacement: The manual or support team identifies a damaged part. Record the exact part number and what the replacement includes.
- Request service: The concern involves the appliance body, cord or plug, or cannot be resolved through the user guide. Keep the appliance unplugged; do not attempt an internal repair.
A passed visual check is not a guarantee of condition. If the appliance has developed an unusual noise, leak or operating problem, report that even when the loose parts look ordinary.
7. Keep the record with the appliance
Before ordering, ask the supplier to confirm compatibility with the full model number. Nutribullet specifically warns that its cups and blades are model-specific. Include photographs and the part description rather than relying on a similar-looking listing.
Save the response alongside the receipt using a simple system for keeping receipts and warranty details. Note whether support recommended a part, an adjustment or service, so another household member does not repeat the investigation.
Give clean accessories a clear storage spot and keep suspect parts separate from the ready-to-use set. If the cupboard needs rearranging, the guide to pantry and fridge containers that actually get used can help organise the containers sharing that space.
Next step: Choose the appliance with the unresolved problem, photograph its model label and suspect part, and send those details to the manufacturer’s Australian support team.
How we checked this
Checked on 29 September 2026 against published KitchenAid Australia and nutribullet guidance. This is an editorial comparison, with no hands-on testing. Manufacturer examples explain specific inspection decisions; your Australian model’s instructions take priority.
The one-page family week
One printable page that holds the whole week: meals, school, activities and who is doing the pickup. Free, and we send one useful email a week.
One email a week. No spam, unsubscribe in a click.