What is in this guide
- 1. Match the exact food and variant
- 2. Read the ingredients before judging the picture
- 3. Find out what the labelled serving means
- 4. Compare nutrition figures on the same basis
- 5. Read the date and storage wording on this pack
- 6. Check how the pack will work at school
- 7. Compare the price after checking the quantity
- 8. Make one clear purchase note
Check the full product name, ingredients, serving size, storage wording and pack quantity before buying packaged food for school lunches. Then compare similar options using matching nutrition columns and unit prices, and check that the packaging suits the lunchbox and your child’s school routine.
The front of a pack can help you find an item, but turn it over before deciding. A useful product label school lunches checklist should leave you knowing what you are buying, how you will pack it and which information still needs checking.
1. Match the exact food and variant
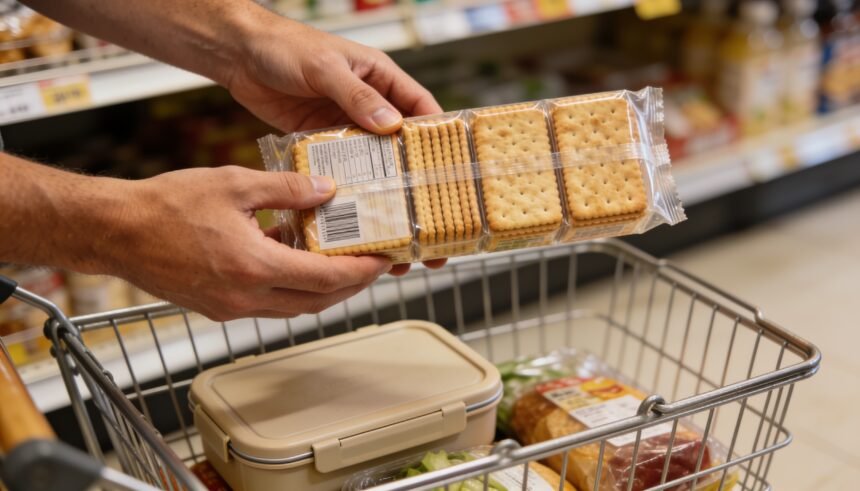
Read the product description as well as the large name on the front. Check the flavour, format, total weight and number of individual packs. A mixed multipack needs a closer look than several identical portions because you may not want every variety for school.
Start with a specific gap in your lunch list: crackers to go beside cheese, a yoghurt portion or an afternoon snack. This gives you something concrete to compare. A bright lunchbox picture on the wrapper does not answer whether that food fits the lunch you intend to pack.
For an online order, make sure the label photograph matches the selected size and variant. If the back panel is missing or too small to read, look for the exact product on the manufacturer’s website or ask for the information before ordering.
2. Read the ingredients before judging the picture
Food Standards Australia New Zealand explains that ingredients appear in descending order by weight when they go into the food. Use that order to understand the product’s composition. Do not assume that the ingredient pictured most prominently is the largest ingredient. [S1]
Look for a percentage beside the ingredient you are interested in, where one is provided. FSANZ says most packaged foods declare percentages for their characterising ingredients. This can help when comparing two similar products carrying the same fruit or other ingredient in their names. [S1]
Keep this check descriptive. An ingredient list tells you what is declared; it does not establish whether a food suits every child’s needs. If your household or school has an existing ingredient restriction, read the relevant declarations against that requirement. Leave an uncertain match unresolved and seek clarification through your established school or care arrangements rather than guessing from the front label.
3. Find out what the labelled serving means
Locate the serving size and servings per package. FSANZ notes that the food business determines the serving size, so it can differ between products. A serving on the panel is a reference quantity for the figures, not an instruction about what your child must eat. [S2]
Check whether one inner packet corresponds to that reference quantity. Do not automatically count a large outer pack as one portion, or assume that each wrapped item matches a listed serving.
For your shopping list, separate three questions: how much food is in the pack, how it is divided, and how much you intend to put in the lunchbox. A packet might suit your plan even if those quantities differ, but you need to know whether you will be dividing it at home.
4. Compare nutrition figures on the same basis
When comparing similar foods, use the per 100 g column for both solids or the per 100 mL column for both liquids. FSANZ identifies these columns as useful for comparing similar products. Comparing one food’s per-serving figure with another’s per-100 figure mixes different quantities. [S2]
Read the heading and unit before the number. Keep the comparison to equivalent foods, such as two plain cracker options, rather than treating the panel as a universal ranking of everything in a lunchbox.
You can use the figures to understand a difference between two candidates without declaring one the right choice for every child. This checklist does not set sugar, sodium or other nutrient cut-offs. Once the quantities are comparable, consider the whole buying decision, including the intended lunch, ingredients and practical requirements.
5. Read the date and storage wording on this pack
Find the date mark and its accompanying words, then read any storage and after-opening instructions. Keep the exact wording together in your decision. If you cannot find or understand an instruction, ask the supplier rather than borrowing directions from a similar food.
Check these requirements against the school day you are actually buying for. Does the product’s labelled storage need fit your available lunch setup? Can you follow any after-opening direction if you divide a larger pack across several lunches? A cupboard space and a lunch bag are different parts of your plan, so consider both.
Where the instructions require a setup you do not currently have, price that decision separately from the food purchase. For equipment questions, comparing cooler bags for school and sport covers the bag choice. Keep following the food’s own directions; an equipment description does not replace them.
6. Check how the pack will work at school
Look at the inner packaging, opening method and any accessories required. Does the food need a spoon? Will you send the original packet or transfer it into a container? Is the pack intended to be resealed, and does that matter to the way you will use it?
Do not buy a full week’s supply on the assumption that a child can manage an unfamiliar lid or wrapper. If the opening is uncertain, choose a small initial purchase and check it at home before making it part of the school routine. This is a practical purchasing suggestion, not a claim about any particular pack.
Check the container you already own before shopping for another. A bulky pouch or pot may change how the rest of lunch fits. If your container itself needs replacing, choosing a lunchbox for Australian school kids is the separate equipment decision.
7. Compare the price after checking the quantity
Read the total selling price alongside the unit price on the shelf or online listing. The ACCC explains that unit prices show cost for a standard measurement, allowing comparison between similar groceries. Match the units before deciding which pack costs less for an equivalent amount. [S3]
Then check the quantity you will use. Individual wrapping may suit your mornings, while a larger pack may require containers and time to divide it. Those are trade-offs to assess against your routine, not reasons to assume either format is always better value.
Use comparing unit prices before buying household basics if the units differ or you need help with the calculation. Keep the checkout total in view too: a lower unit price does not tell you whether this week’s grocery budget can accommodate the larger pack.
8. Make one clear purchase note
Before adding the food to your trolley, record:
- The exact product and variant you checked.
- The pack quantity and how you intend to divide it.
- Any labelled requirements you need to accommodate.
- Any school or household requirement still needing clarification.
- The comparison unit and total price you are paying today.
On your next shop, apply this checklist to one candidate pack beside the lunch list. Buy it only when the information needed for that purchase is clear; leave an unresolved question on the list for follow-up.
How we checked this: FSANZ ingredient and nutrition-panel guidance and ACCC unit-pricing guidance were reviewed on 6 October 2026. The checklist is an editorial shopping method. No foods or packaging were tested, no prices collected and no dietary suitability verdicts made.
The one-page family week
One printable page that holds the whole week: meals, school, activities and who is doing the pickup. Free, and we send one useful email a week.
One email a week. No spam, unsubscribe in a click.