What is in this guide
To clean a drink bottle with suspected mould, empty it, separate the removable parts and wash the bottle, lid, straw and seals according to its care instructions. Rinse thoroughly and dry everything apart; if mould remains or a hidden section cannot be cleaned, set the item aside and contact the manufacturer.
Start with the lid instructions
Look up the exact bottle or lunchbox model before pulling out seals or putting it in the dishwasher. Check which parts come off, how they go back and whether the body and lid have different washing rules. Save the diagram for the next wash.
Manufacturer instructions differ even within a brand. Sistema’s Hydrate guide permits top-rack dishwashing for its plastic bottles but says its stainless steel bottles and lids are unsuitable for dishwashers. A dishwasher symbol on one container tells you nothing about the next bottle in the cupboard.
For the first dismantling, take a photo of the assembled parts. Keep each bottle’s pieces together on the bench so similar-looking seals do not become a reassembly puzzle.
Wash the bottle and its small parts separately
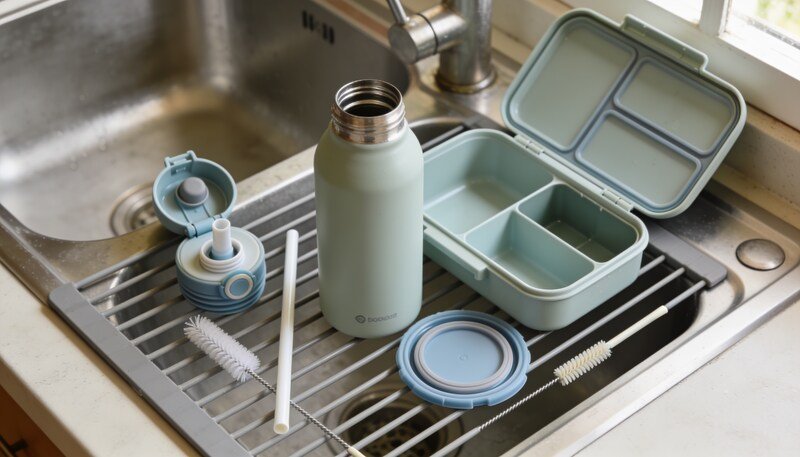
Gather mild washing-up liquid, a soft bottle brush, a suitable narrow straw brush and a clean drying rack or cloth. Follow this order, adapting it to the model’s instructions:
- Empty and dismantle. Remove the lid and any straw, spout or seal designed to come out. Leave fixed components in place and consult the maker if the assembly is unclear.
- Wash the body. Use warm soapy water and a soft brush to reach the base, inside walls and neck. Include the drinking rim and screw thread in the wash.
- Clean the drinking path. Brush inside removable straws and around accessible spouts and valves. Choose a brush that fits the opening without forcing it.
- Wash the separate lid pieces. Work around the exposed seal channel and both sides of removable seals. The underside deserves the same attention as the top.
- Rinse every part. Run clean water through the straw and rinse the lid pieces separately to remove soap.
b.box’s cleaning guidance specifically highlights spouts, valves and straw interiors. Its mould-care guidance also calls for disassembly and drying before reassembly. Use those principles alongside the instructions for your own bottle.
Give lunchbox seals their own wash
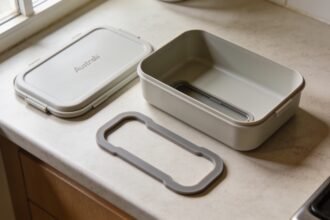
Empty the lunchbox and remove any detachable tray, divider and silicone seal as directed. Wash the compartments and accessible lid recesses with warm soapy water. For Sistema Lunch containers, the manufacturer permits top-rack dishwashing and advises against abrasive scrubbers or sharp utensils that could scratch the surface.
For a b.box lunchbox with a removable seal, the Australian instructions describe gently pulling its tab to release it. After washing and complete drying, align the seal and press its edges firmly into place. That method belongs to that design; check another brand’s instructions before trying the same movement.
If the box leaks after cleaning, compare the reassembled seal with the maker’s diagram before replacing the whole box. The separate guide to leakproof lunchboxes explains the containment question when cleaning is not the issue.
What if the mould will not come off?
Stop using the affected item while you resolve it. Check whether you missed a removable component, then follow any additional cleaning directions supplied for that exact model. Do not keep escalating to stronger cleaners on guesswork: Sistema’s Hydrate instructions explicitly prohibit bleach and chlorine cleaners.
If marks remain after the permitted cleaning, send the manufacturer a photo and the model name. Ask whether the affected part needs replacing and whether a matching replacement is available. Our practical recommendation is to set aside a part you cannot access or clean satisfactorily, rather than pack it for tomorrow while the question remains unresolved.
This washing routine does not establish that a mould-affected item has been sterilised.
Leave enough room for drying
Keep washed components separate until completely dry, following the manufacturer’s storage instructions. Avoid putting a lid back on simply to clear the bench. On a small draining area, make space for the loose seals and straws before starting the wash.
Make unpacking lunch gear part of arriving home from school. b.box recommends cleaning after use so residue does not harden. For term breaks, wash and dry the gear before putting it away, then check its condition before the next use.
Next: check your bottle’s lid diagram and dismantle today’s gear for washing. For the separate packing problem, see keeping lunchboxes cold.
The one-page family week
One printable page that holds the whole week: meals, school, activities and who is doing the pickup. Free, and we send one useful email a week.
One email a week. No spam, unsubscribe in a click.